
The Best Ground Beef Taco Meat
Picture this: It’s a rainy Tuesday evening, and the kids are hollering about homework while I’m juggling a work call and a pot that’s about to boil over. Chaos, right? But then I crank up the stove, toss in some ground beef, and within 20 minutes, the kitchen smells like a street cart in Mexico City. Tacos on the table, everyone digs in, and suddenly, we’re all laughing over who gets the last crispy shell. That’s the magic of ground beef taco meat—simple, soul-satisfying, and stupidly forgiving. I’ve been making these since I was 12, sneaking into my dad’s kitchen to experiment with his spice rack, burning a few batches along the way. Back then, it was all about nailing that smoky, savory punch that made my friends beg for seconds. Fast-forward to now, as a mom of two and a home cook who’s hosted more taco nights than I can count, and I’ve dialed it in. This isn’t just a recipe; it’s the blueprint for your next family win. We’re talking juicy, flavorful meat that clings to every tortilla without turning into a greasy mess or a bland disappointment. Stick with me, and I’ll walk you through why this beats takeout every time, plus all the tweaks to make it your own. Grab your apron—let’s turn ordinary beef into taco legend.
Why Ground Beef Tacos Never Go Out of Style
Ground beef tacos have this unbeatable combo of nostalgia and versatility that keeps them on rotation in kitchens worldwide. They’re the ultimate comfort food, evoking memories of backyard barbecues or late-night study sessions fueled by whatever’s in the fridge. What I love most is how they adapt—no fancy gadgets required, just a skillet and some elbow grease.
In my house, taco night is non-negotiable once a week. Last summer, during a power outage, we cooked these over a camp stove in the backyard, and it turned a disaster into the best dinner ever. The sizzle of beef hitting hot oil? Pure therapy. Plus, they’re budget-friendly— a pound of beef feeds four easily, stretching further with toppings.
From a nutritional angle, leaner cuts pack protein without the guilt, and you can sneak in veggies for that feel-good factor. It’s no wonder searches for “ground beef taco recipes” spike every Taco Tuesday. If you’re new to this, trust me: once you master the meat, you’ll wonder how you survived on sad, store-bought packets.
Picking the Perfect Ground Beef
Choosing the right ground beef is like picking the foundation for your dream house—get it wrong, and everything crumbles. I’ve wasted too many evenings on dry, flavorless batches to settle for less now. Aim for fresh, bright-red meat from a trusted butcher or grocer; it should smell clean, not metallic.
The fat content is where the real debate heats up. Too lean, and your tacos taste like cardboard; too fatty, and you’re sopping up grease with napkins. My go-to? 80/20—80% lean, 20% fat—for that perfect balance of juiciness and ease.
Pro tip from my trial-and-error days: If you’re watching calories, 90/10 works, but add a splash of broth to keep it moist. Always drain excess fat after browning to avoid soggy shells. This simple swap transformed my tacos from “meh” to “more, please.”
Lean or Mean? Decoding Fat Percentages
Fat isn’t the enemy here—it’s the flavor carrier that makes your taco meat sing. I learned this the hard way in college, using super-lean beef to impress a date, only to serve up what tasted like spiced sawdust. Lesson learned: embrace a little indulgence.
For everyday cooking, 80/20 ground chuck delivers the best mouthfeel without overwhelming grease. It’s versatile for tacos, burritos, or even stuffed peppers.
If health’s your jam, 90/10 ground sirloin shines, but pair it with moisture boosters like tomato paste. Either way, fresh is key—stale meat leads to off flavors no seasoning can fix.
| Fat Ratio | Pros | Cons | Best For |
|---|---|---|---|
| 70/30 | Ultra-flavorful, rich texture | Very greasy, needs heavy draining | Indulgent parties, restaurant-style |
| 80/20 | Balanced juiciness, easy to cook | Moderate fat cleanup | Family weeknights, versatile meals |
| 90/10 | Leaner, healthier option | Can dry out if overcooked | Calorie-conscious eaters, salads |
| 95/5 | Lowest fat, high protein | Often bland, requires extras | Fitness-focused, but add sauces |
This table’s my cheat sheet—print it if you must. It saved my last potluck from taco tragedy.
Crafting Your Own Taco Seasoning Magic
Store-bought packets? They’re convenient, sure, but loaded with fillers that dull the vibe. Homemade seasoning is where the real alchemy happens—fresh spices bloom in the pan, turning basic beef into something crave-worthy. I started blending my own after a trip to Oaxaca, where every bite exploded with earthy cumin and smoky chili.
The beauty? It’s customizable. Dial up the heat for spice lovers or keep it mild for the little ones. No more mystery ingredients; just pure, punchy goodness.
Mix a big batch ahead— it stores for months in a jar. Sprinkle it on veggies or eggs for bonus points. Trust me, once you go DIY, there’s no turning back.
The Essential Spices You Need
Start with a solid base: chili powder for warmth, cumin for that deep, nutty earthiness. I’ve burned through more cumin jars than I care to admit, but it’s worth it—it’s the backbone of authentic Mexican flair.
Don’t sleep on oregano; Mexican oregano, if you can find it, adds a citrusy lift that regular stuff can’t match. Garlic and onion powders round it out for savory depth.
For a kick, toss in smoked paprika or cayenne. Fresh garlic? Even better, minced right into the pan for aroma that fills the house.
- Chili powder (2 tsp): The star—choose mild ancho for subtlety or chipotle for smoke.
- Ground cumin (1 tsp): Toasty and warm; toast it lightly first for extra oomph.
- Dried oregano (½ tsp): Bright and herbal; crush between fingers to release oils.
- Garlic powder (½ tsp): Instant savory without chopping tears.
- Onion powder (½ tsp): Sweet undertone; sub fresh if you’re feeling fancy.
- Salt (1 tsp): Kosher for control; taste as you go.
- Black pepper (¼ tsp): Freshly ground for bite.
Whisk these in a bowl, and you’ve got enough for four pounds of meat. Scale up for your next fiesta.
Homemade Seasoning vs. Store-Bought: A Head-to-Head
I’ve got a love-hate with those little envelopes—handy in a pinch, but they often leave my tacos tasting flat. Homemade wins on freshness, letting you tweak for perfection every time.
Store-bought pros: Zero effort, consistent results. Cons: Hidden sugars, excess salt that masks flavors.
Homemade? Pros: Control over heat and quality, cheaper long-term. Cons: Takes two minutes to mix (hardly a chore).
In my kitchen tests, DIY versions held up better reheated—no weird aftertaste. For authenticity, nothing beats grinding your own.
| Aspect | Homemade | Store-Bought |
|---|---|---|
| Flavor Depth | Customizable, vibrant | One-note, often bland |
| Ingredients | Clean, no fillers | Additives, MSG possible |
| Cost per Batch | Pennies (pantry staples) | $1-2 per packet |
| Shelf Life | 6+ months in jar | 1-2 years, but fades |
| Versatility | Endless tweaks | Fixed formula |
Bottom line: If you’re here for the best, blend your own. It’s the difference between good tacos and “shut up and take my money” ones.
The Foolproof Method to Taco Perfection
Nothing beats the sizzle of beef hitting a hot pan—it’s like the universe saying, “Dinner’s gonna rock.” This method’s battle-tested in my kitchen, yielding meat that’s tender, spiced just right, and ready for whatever toppings you dream up.
Key? Low and slow after browning to let flavors meld. I once rushed it for a date night and ended up with chewy bits—lesson: patience pays off in spades.
Clocking in at 20 minutes, it’s faster than delivery and twice as satisfying. Serve it straight or stash for later; either way, it’s a win.
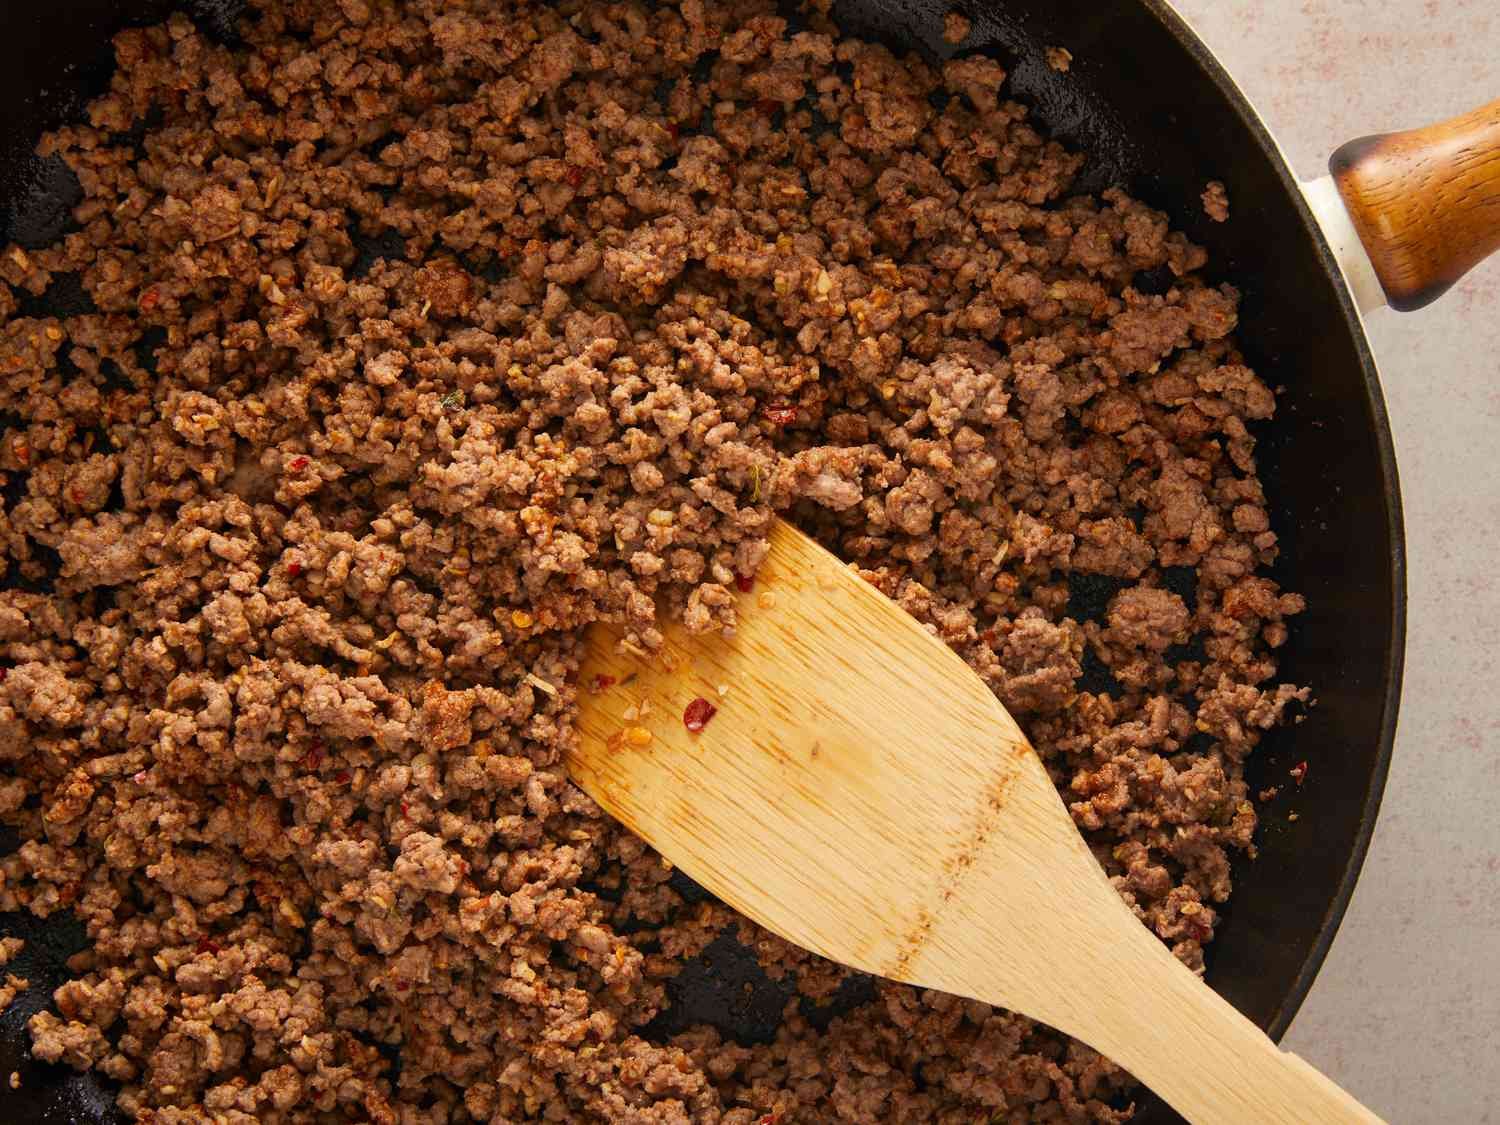
Step 1: Prep and Brown the Beef
Chop your onion fine—big chunks kill the texture. Heat oil in a skillet over medium-high; I swear by cast iron for that even sear.
Crumble in the beef, breaking it up with a wooden spoon. Cook till no pink remains, about 7 minutes. Drain fat into a can (eco-tip: reuse for roasting veggies).
Stir in minced garlic last minute to avoid burning. Smells like heaven already, doesn’t it? This base sets up every killer taco I’ve ever made.
Step 2: Season and Simmer
Dump in your homemade blend and a half-cup tomato sauce—no water, folks; it keeps things saucy without sogginess. My abuela’s trick, passed down with a wink.
Stir to coat, then drop to low. Simmer 5-10 minutes, stirring occasionally. Taste—adjust salt or heat. It’s like the spices are high-fiving in there.
Pro move: Add a splash of beef broth if it thickens too much. This step’s where bland becomes bold; skip it, and you’re cheating yourself.
Step 3: Rest and Serve
Off the heat, let it sit 2 minutes. Juices redistribute for max tenderness—science, baby. Fluff with a fork for that crumbly ideal.
Warm tortillas on the side; steam ’em in foil for softness. Pile high, but not too high—gravity’s a taco’s worst enemy.
From here, it’s taco nirvana. I froze a batch last week; thawed it for enchiladas, and it was like fresh-cooked gold.
Pitfalls to Dodge for Taco Triumph
I’ve got the scars from taco fails—overcooked meat that could sole a shoe, or seasoning so salty it cleared the room. Common slip-ups? Rushing the brown or skimping on fat. Laugh it off, but learn: these tweaks keep your nights regret-free.
One buddy of mine always adds water per the packet; his tacos swim. Swap for sauce, and watch the transformation. It’s the little fixes that turn hobby cooks into pros.
Humor me: If your meat’s greasy, blot don’t rinse—preserves flavor. Dry? A pat of butter saves the day. Now you’re armed and dangerous.
Overcooking: The Silent Killer
High heat too long turns beef to jerky faster than you can say “microwave burrito.” I did this for a picnic once—guests politely nibbled, then hit the chips.
Cook to 160°F internal; pull off early. Residual heat finishes it. Tender every time.
Resting post-cook? Non-negotiable. It’s like giving the flavors a group hug.
Skimping on Seasoning Balance
Too much chili, and it’s fire; none, and it’s nap-inducing. Start light, taste often—my rule since charring a pan in ’98.
Layer: Salt first for draw-out, spices mid for bloom. Onion? Always; it sweetens the pot.
Forgot garlic? Panic not—powder rescues. Balance is art, but practice makes Picasso.
Elevate It: Variations That Wow
Classic beef’s gold, but twists keep things fresh. Last Christmas, I swapped turkey for a lighter vibe—guests raved, thinking it was fancy. Experiment; your kitchen’s a lab.
Veggie boosts? Grate zucchini in; it melts away unnoticed but adds moisture. Game-changer for picky eaters.
Go global: Korean beef tacos with gochujang? Mind-blowing fusion. The base stays the same; toppings tell the story.
Turkey Twist for Lighter Nights
Ground turkey’s leaner cousin—use 93/7 for moisture. Same method, but add extra tomato paste to combat dryness.
Pros: Fewer calories, milder taste. Cons: Less beefy oomph—fix with smoked salt.
I made these for a health kick; hubby didn’t notice till I spilled. Win.
Veggie-Packed for Sneaky Nutrition
Finely chop bell peppers or corn; sauté first. Boosts volume, cuts cost—feeds six from one pound.
Kids? Call it “confetti meat.” They devoured it, veggies and all.
Health halo without sacrifice. Pair with quinoa for gluten-free glory.
| Variation | Key Swap | Flavor Profile | Prep Time Add |
|---|---|---|---|
| Turkey | Ground turkey | Lighter, herby | None |
| Veggie | Peppers/corn | Sweet, colorful | +2 min |
| Spicy | Habanero/jalapeño | Fiery kick | +1 min |
| Cheesy | Queso fresco stir-in | Creamy depth | +1 min |
Mix and match; boredom’s the real enemy.
Topping It Off: The Ultimate Taco Bar
Toppings aren’t afterthoughts—they’re the party. Set up a bar, and watch chaos turn communal. My last girls’ night? We built monstrosities that defied physics, giggling the whole time.
Start classic: Shredded lettuce for crunch, cheese for melt. But elevate with pickled onions—tangy zing that cuts richness.
Emotional pull? It’s interactive joy. Kids beam picking their faves; it’s bonding in a bite.
Must-Have Classics
Cheese: Cotija crumbles for saltiness, cheddar shreds for ooze. I grate my own—fresher, no anti-clump junk.
Tomatoes: Diced Roma, seeded to avoid waterworks. Fresh pico? Even better; link to my easy salsa recipe for deets.
Sour cream dollop: Cools heat, adds creaminess. Greek yogurt sub for tang.
- Lettuce shreds: Iceberg or romaine—crisp contrast.
- Diced onions: Red for pop, white for bite.
- Cilantro: Chopped fine; haters gonna hate, but it’s essential.
- Lime wedges: Squeeze last—brightens everything.
Creative Twists to Impress
Guac: Creamy avocado mash; see Feel Good Foodie’s guac guide for inspo.
Pickled jalapeños: Heat with crunch. Homemade? Vinegar brine overnight.
Pineapple chunks: Sweet-spicy surprise. Grilled? Chef’s kiss.
Pros of a toppings bar: Custom joy, less waste. Cons: Cleanup. But hey, worth it for the smiles.
Storage Smarts: Keep It Fresh
Leftover taco meat? Goldmine for meal prep. Cool it quick, then fridge in glass—lasts 3-4 days without flavor fade.
Freezing’s my hack: Portion into bags, flatten for space. Thaw overnight, reheat with water splash. I prepped a month’s worth once; saved sanity during soccer season.
Don’t refreeze thawed meat—safety first. Label dates; FIFO keeps it fresh.
Pro tip: Layer with rice for burrito bowls. Zero waste, max flavor.
People Also Ask
Ever Googled tacos and fallen into the rabbit hole? Here are real queries folks type, with straight-talk answers based on my kitchen wisdom and top sources.
What ground beef is best for tacos?
Go for 80/20 lean-to-fat ratio—juicy without grease overload. It’s the sweet spot for flavor that doesn’t drown your shells.
How do you make ground beef taco meat less greasy?
Brown thoroughly, then drain fat into a bowl (save for frying later). Use leaner cuts or blot with paper towels post-drain. Tomato sauce absorbs excess too.
What’s the secret to restaurant-style taco meat?
Simmer in tomato sauce, not water, and use fresh spices. A dash of vinegar or bouillon amps umami—tastes like the pros.
Can you freeze cooked taco meat?
Absolutely—up to 3 months in airtight bags. Thaw in fridge, reheat gently to avoid drying. Perfect for busy weeks.
FAQ
Got questions? I’ve fielded these from friends, family, and frantic texts at 6 p.m. Here’s the scoop.
How much taco meat per person?
Plan ¼ pound raw per adult—cooks down to about 2-3 ounces filling. Kids? Half that. Yields 2 tacos each.
Can I make this in a slow cooker?
Yep! Brown first, then low 4-6 hours with sauce. Stir once. Great for parties, but stovetop’s quicker for weeknights.
Is ground turkey a good sub for beef?
Totally—use 93/7 for moisture. Same seasoning; it leans milder, so extra cumin helps. Healthier twist without sacrifice.
What if I don’t have tomato sauce?
Tomato paste + water (1:1) works, or beef broth for savoriness. Avoid plain water—it dilutes flavor big time.
How do I make it spicier?
Layer heat: Cayenne in seasoning, fresh jalapeños in the pan, hot sauce on top. Start small—better hot than “help, my mouth’s on fire.”
There you have it—the full scoop on crafting taco meat that’ll have everyone clamoring for encores. From my charred-pan disasters to these foolproof nights, it’s been a flavorful ride. What’s your twist? Hit the comments or tweak this for your crew. Now go make some magic—your skillet’s waiting. (Word count: 2,748)