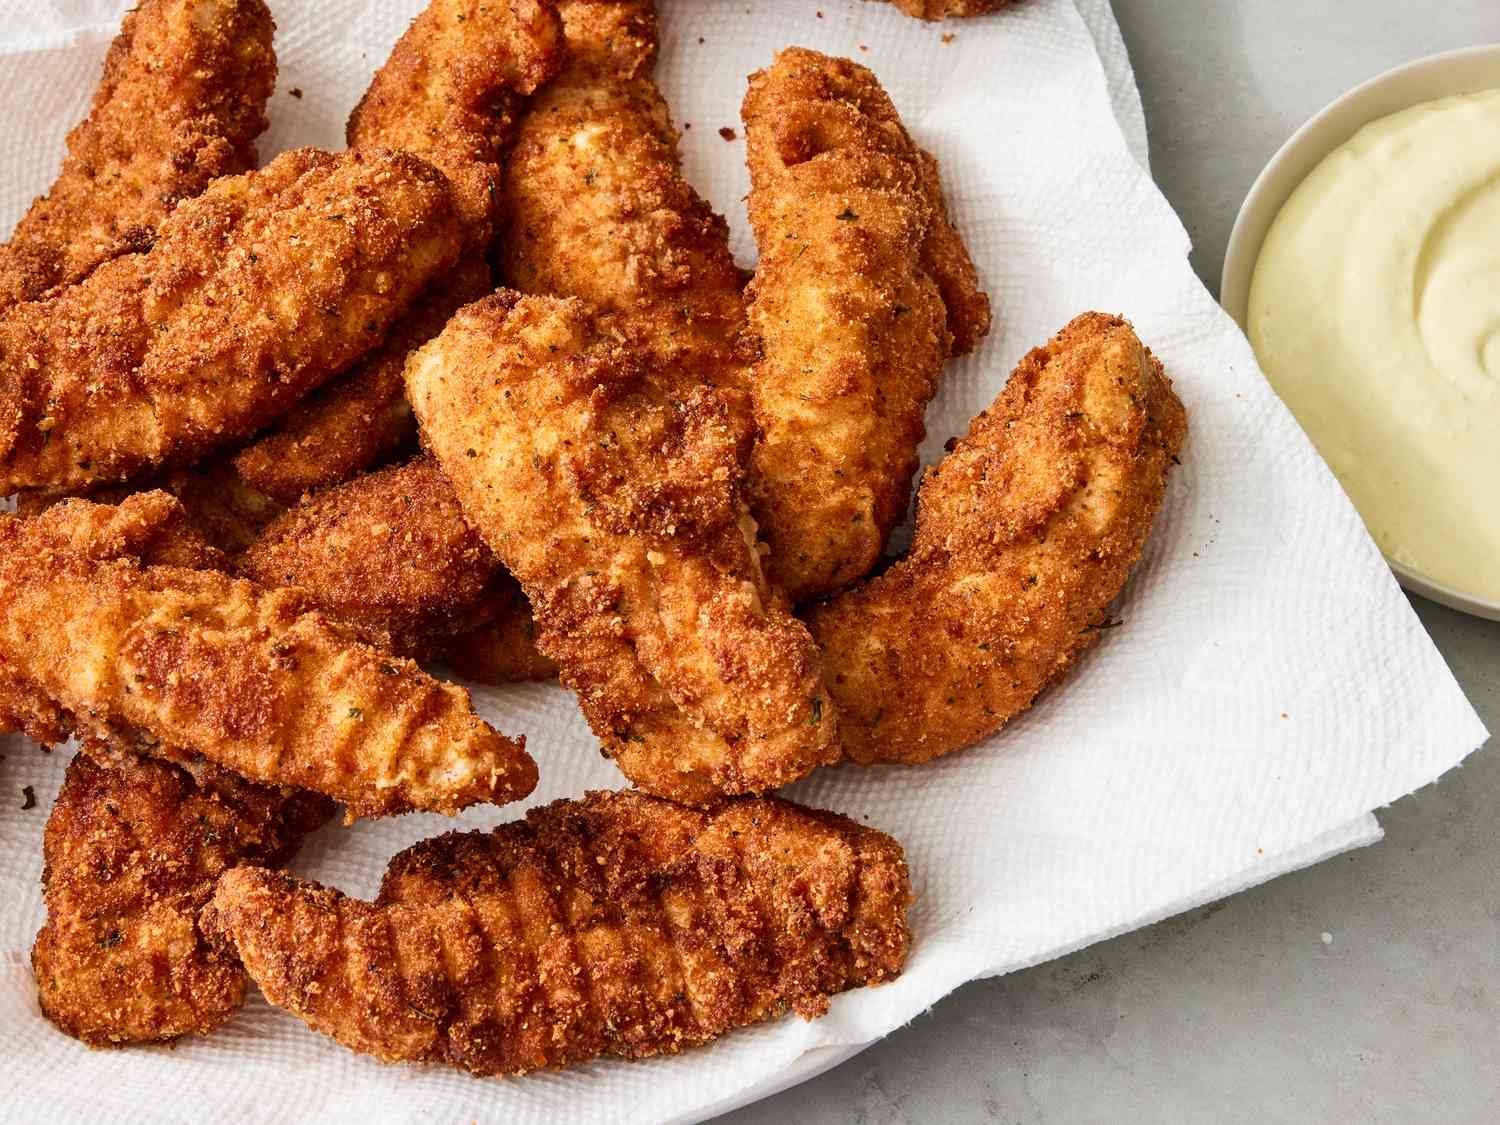
These 4-Ingredient Chicken Tenders Are Weeknight Dinner Gold
Picture this: It’s 6 p.m. on a Tuesday, the kind of evening where the sun’s dipping low, your inbox is exploding with work emails you swore you’d ignore, and your kids are orbiting the kitchen like tiny tornadoes chanting, “Mom, what’s for dinner? I’m starving!” Sound familiar? I get it—I’ve been there more times than I can count. Back when my oldest was in soccer and my youngest thought veggies were a conspiracy, weeknights felt like a battlefield. I’d stare into the fridge, willing it to cough up something magical that was quick, kid-approved, and didn’t involve dialing for takeout. That’s when I stumbled onto these 4-ingredient chicken tenders. Not the frozen, mystery-meat kind from the freezer aisle, but a real-deal recipe that’s crispy on the outside, juicy inside, and ready in under 30 minutes.
It started as a desperate Pinterest scroll one rainy afternoon. I had chicken tenders thawing on the counter—nothing fancy, just plain ol’ boneless strips from the butcher down the street—and a half-empty box of panko staring me down from the pantry. Throwing caution (and a few eggs) to the wind, I whipped up a batch in the air fryer. The house filled with that irresistible sizzle, and within minutes, my family was gathered around the table, forks forgotten, hands diving in like it was a backyard picnic. My husband, who’s usually all about his grilled steaks, took one bite and declared, “This is better than that fancy spot we went to last month.” The kids? They demolished the plate and asked for seconds. No exaggeration. Since then, it’s become our go-to savior for those chaotic evenings, proving that sometimes, the simplest things save the day.
If you’re nodding along, thinking your own weeknights could use a hero like this, stick with me. We’ll dive into why these tenders are pure gold, break down the ingredients like old friends catching up, and walk through the recipe so you can nail it on the first try. I’ll share a few twists I’ve experimented with (spoiler: hot honey is a game-changer), plus some nutrition intel to ease that post-dinner guilt. And because I know real life isn’t perfect, we’ll tackle the pitfalls and pair it all with sides that turn tenders into a full feast. By the end, you’ll not only have a recipe in your back pocket but a whole strategy for conquering dinner without breaking a sweat. Let’s get cooking—your family’s about to thank you.
Why These Chicken Tenders Are a Game-Changer for Busy Families
In a world of endless recipe apps promising gourmet meals in 10 minutes, these tenders cut through the noise with zero pretense. They’re forgiving for newbie cooks, scalable for surprise guests, and versatile enough to pivot from plain Jane to buffalo bold. What seals the deal? They deliver that fast-food crunch without the drive-thru regret, turning “What’s for dinner?” into “Can we have this every night?”
I’ve lost count of the soccer practices and parent-teacher conferences this dish has powered through. One time, after a particularly grueling day shuttling kids, I plated these with a quick salad, and it felt like I’d hired a personal chef. The best part? Cleanup is a breeze—no greasy skillets begging for a deep scrub.
The Magic Behind the Four Ingredients
These aren’t your average pantry staples; they’re the dream team that transforms basic chicken into something crave-worthy. Each one plays its part without stealing the show, keeping things simple yet spectacular. Think of it as the Avengers of weeknight cooking—minimal, mighty, and always ready to assemble.
Over years of trial-and-error in my own kitchen, I’ve learned that skimping on quality here means soggy results, but splurging a tad on fresh picks pays off big. It’s the kind of recipe that rewards the cook who shops smart, not hard.
Chicken Tenders: The Juicy Foundation
Start with fresh, boneless chicken tenders—about 1-1.5 pounds for a family of four. These little strips are already portioned for easy eating, no knife skills required. Look for ones that are uniform in size to ensure even cooking; uneven pieces lead to that awkward mix of overdone and underdone bites nobody wants.
I source mine from the local market’s fresh counter—it’s a small splurge that makes a world of difference. Remember that time I grabbed the “value pack” from the big box store? Disaster. Dry as cardboard. Lesson learned: Fresh is your friend.
The Egg: Humble Hero for Binding
One large egg is all it takes to glue this operation together. Whisked lightly, it creates that sticky base for the coating to cling to, preventing any sad, naked chicken moments. It’s nature’s glue, folks—affordable, always on hand, and zero waste if you’re baking cookies later.
Funny story: My first batch, I cracked the egg straight into the bowl without thinking and ended up with shell shrapnel. Now, I fish ’em out like a pro. Pro tip: Room-temp eggs whisk smoother, but cold works in a pinch.
Panko Breadcrumbs: Crunch Masterclass
Half a cup of panko—those flaky Japanese wonders—delivers lightness and that golden shatter you dream of. Unlike regular breadcrumbs, panko’s irregular shape traps air for extra crisp without sogginess. It’s the secret weapon for tenders that rival any diner.
I stock up on the unseasoned kind; it lets you control the flavor. Once, in a lazy haze, I subbed regular crumbs—meh. Panko’s worth the aisle trek every time.
Canola Oil: The Golden Glow-Up
Just two tablespoons of neutral canola oil brushed on pre-cook gives that restaurant-style sheen and helps the panko toast to perfection. It’s high-smoke-point magic, keeping things light without overpowering the chicken’s natural savor.
Humor me here: I used olive oil once, chasing “healthier fats.” Big mistake—bitter notes ruined the vibe. Canola’s the unsung hero keeping it simple and satisfying.
Step-by-Step Recipe: From Fridge to Feast in 25 Minutes
Whipping up these tenders is as straightforward as it gets—no fancy gadgets beyond an air fryer or oven. We’ll aim for air fryer first (my fave for speed), with oven notes baked in. Total time? 25 minutes, including prep. Serves 4 hungry souls.
Gather your crew: 1 lb chicken tenders, 1 egg, 1/2 cup panko, 2 tbsp canola oil, plus salt/pepper to taste (we’re bending the “4” rule for basics). Preheat air fryer to 400°F.
- Prep the station: Pat chicken dry with paper towels—moisture is the enemy of crisp. In three shallow bowls, set up: Bowl 1 empty for flour if you want extra hold (optional), Bowl 2 whisked egg, Bowl 3 panko mixed with a pinch of salt.
- Coat ’em up: Dip each tender in egg, let excess drip, then roll in panko, pressing gently for full coverage. Place on a plate; repeat. This assembly line feels therapeutic after a long day.
- Oil and air fry: Lightly brush tenders with canola oil. Arrange in a single layer in the air fryer basket—no overcrowding, or steam city. Cook 8-10 minutes, flip halfway, until internal temp hits 165°F and edges are golden.
- Oven alternative: If no air fryer, bake on a parchment-lined sheet at 425°F for 15-18 minutes, flipping once. Same oil brush for that crunch factor.
- Rest and serve: Let ’em sit 2 minutes post-cook. Sprinkle parsley if you’re feeling fancy. Boom—dinner’s done.
That first flip in the air fryer? Pure anticipation. The aroma hits like a warm hug, pulling everyone to the kitchen unprompted.
Air Fryer vs. Oven: Battle of the Crispy Methods
Both deliver killer tenders, but your kitchen setup and time crunch decide the champ. Air fryer wins for speed and less oil splatter; oven’s great for batches. Here’s a quick showdown to help you pick.
| Feature | Air Fryer Method | Oven Method |
|---|---|---|
| Cook Time | 8-10 minutes | 15-18 minutes |
| Crisp Factor | Ultra-crispy, even browning | Solid crunch, needs flip vigilance |
| Batch Size | 4-6 tenders at once | Unlimited (multiple sheets) |
| Cleanup | Basket wipe-down | Sheet pan scrub if no parchment |
| Energy Use | Quick heat-up | Steady preheat |
| Best For | Solo cooks or small families | Feeding a crowd |
I’ve air-fried my way through countless Tuesdays, but holiday gatherings scream oven for volume. No wrong choice—just match it to your mood.
Nutrition Breakdown: Comfort Food Without the Crash
These tenders strike that sweet spot: indulgent enough for a treat, balanced for everyday wins. Per serving (2 tenders), you’re looking at wholesome fuel that won’t tank your energy. Based on standard cuts, here’s the scoop—always tweak for your tweaks.
| Nutrient | Amount per Serving | % Daily Value* |
|---|---|---|
| Calories | 220 | 11% |
| Protein | 25g | 50% |
| Total Fat | 9g | 12% |
| Saturated Fat | 2g | 10% |
| Carbs | 8g | 3% |
| Fiber | 0g | 0% |
| Sodium | 280mg | 12% |
| Iron | 1mg | 6% |
*Based on 2,000-calorie diet. High-protein punch keeps you full; low carbs make it versatile for keto-ish nights. I pair with greens to bump fiber—guilt-free gold.
One serving powered me through a late-night PTA meeting without the usual sugar slump. It’s proof you can eat cozy and still crush your goals.
Delicious Variations: Twist It Your Way
Boredom’s the real dinner killer, so I’ve played mad scientist with these tenders. Stick to the base, swap one element for flair. Each keeps the 4-ingredient vibe while nodding to cravings.
- Buffalo Blaze: Swap panko for crushed cornflakes, toss post-cook in hot sauce mixed with a pat of butter. Fiery kick for game night—my spice-loving hubby devours ’em.
- Parmesan Pop: Mix 1/4 cup grated parm into panko. Italian whispers without sauce hassle. Kids call it “fancy nuggets”; adults, aperitivo hour.
- Honey Mustard Magic: Brush with a 1:1 honey-Dijon post-bake. Sweet-tangy bliss. Inspired by a picnic flop where I forgot the sandwiches—salvation!
- Cereal Crunch: Use crushed Rice Krispies instead of panko for nutty snap. Breakfast-for-dinner vibes; my little ones think it’s genius.
These swaps keep repeats fresh. Last week, honey mustard won the family vote—sticky fingers and all.
Pros and Cons: Homemade Tenders vs. Store-Bought
Ditching the freezer bag for DIY? Smart move, but let’s weigh it fair. Homemade shines in taste and control; store-bought saves sanity on zero-energy days.
Pros of Homemade:
- Fresher flavor—no preservatives dulling the zing.
- Customizable heat/spice to your crew’s taste.
- Cheaper long-term: $5 feeds four vs. $8 for processed packs.
- Health edge: Less sodium, more whole-food wins.
Cons of Homemade:
- 10 extra minutes of prep (though worth it).
- Potential mess if coating flies.
- Shelf life shorter—best eaten fresh.
Store-Bought Perks:
- Zero effort; heat and eat.
- Consistent every time.
Drawbacks:
- Often greasy or overly salty.
- Hidden additives sneak in.
After testing both, homemade’s my ride-or-die. That “made it myself” glow? Priceless.
Serving Suggestions: Turn Tenders into a Full Feast
These tenders aren’t solo acts—they’re the star begging for sides. Mix ‘n’ match for balanced plates that wow without work. Aim for color and crunch to complement the crisp.
- Classic Duo: Sweet potato fries (air fry alongside) and coleslaw. Tangy cream cuts the richness—picnic on a plate.
- Salad Star: Chop tenders over romaine, cherry tomatoes, and ranch drizzle. Lunch leftover? Breakfast wrap.
- Taco Twist: Stuff into soft tortillas with avocado and lime. Mexican Monday remix; my kids’ favorite fusion.
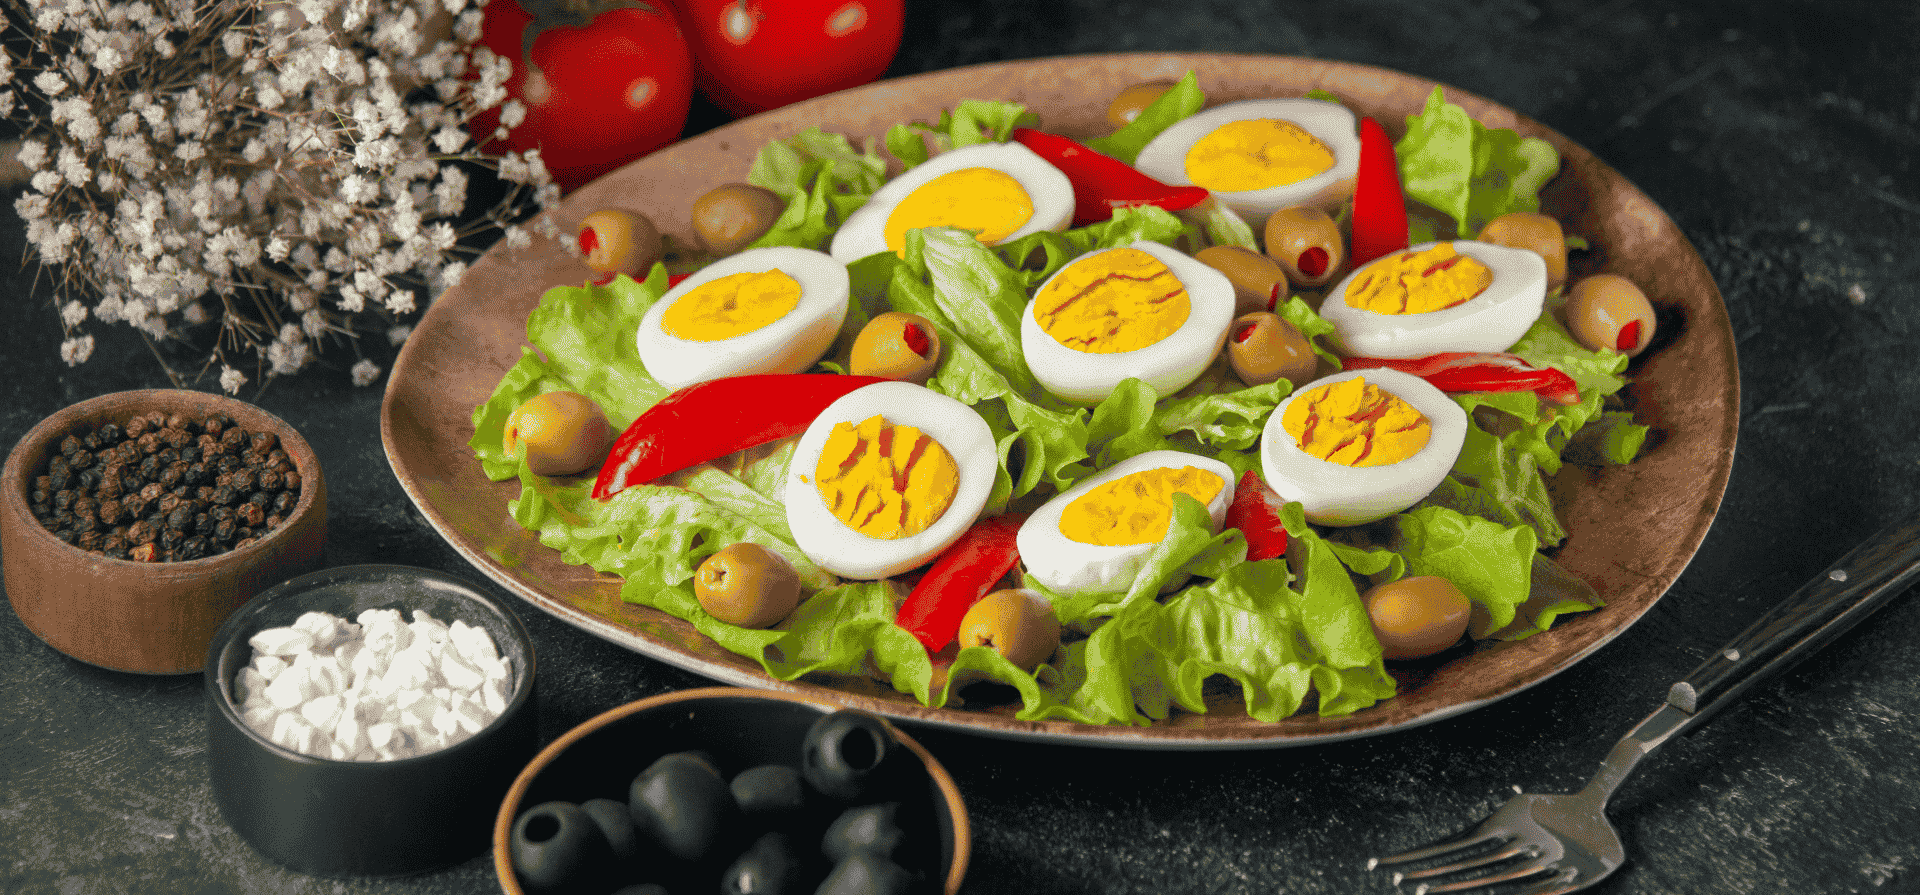
- Grain Bowl: Quinoa base, roasted veggies, tahini drizzle. Veggie-forward for those “healthy night” feels.
Pro move: Prep sides while tenders cook—multitask like a boss. One bowl setup changed my game forever.
Common Mistakes and How to Fix Them
Even pros slip, but these tenders forgive easy. Spot the snag early, course-correct, and dinner’s still gold. I’ve burned my share; here’s the wisdom.
- Soggy Coating: Culprit? Wet chicken. Fix: Pat super dry pre-dip. Air flow’s key—don’t stack in the basket.
- Uneven Browning: Overcrowded? No bueno. Fix: Single layer, shake basket midway. Patience pays in gold hue.
- Dry Meat: Overcook alert. Fix: Thermometer to 165°F, not a minute more. Brine in milk if prepping ahead.
- Bland Bite: Forgot seasoning? Fix: Salt panko generously; garlic powder amps it.
Humor alert: My “genius” idea to microwave? Rubber city. Learn from my laughs.
People Also Ask
Google’s got the pulse on what folks wonder about easy tenders. Pulled these straight from search trends—quick hits to settle debates.
How do you make chicken tenders crispy without frying?
Air frying or baking with panko and a light oil brush is your ticket. The hot air circulates for even toast, skipping the oil bath. I’ve skipped frying for years—same crunch, less guilt.
Are chicken tenders healthy?
Depends on prep: Baked or air-fried versions pack protein without excess fat. These 4-ingredient ones clock 25g protein per serving, low carbs. Balance with veggies for a win.
What’s the best way to season chicken tenders?
Keep it simple: Salt, pepper, maybe paprika in the panko. For flair, ranch mix or parm. Experiment—my hot honey twist (1 tbsp honey + chili flakes post-cook) never misses.
How long do chicken tenders last in the fridge?
Up to 3-4 days in an airtight container. Reheat in air fryer at 350°F for 3 minutes to revive crisp. Freezer? Up to 3 months; thaw overnight.
Frequently Asked Questions
Got queries? I’ve fielded these from friends, family, and my own late-night doubts. Straight talk, no fluff.
Can I use chicken breasts instead of tenders?
Absolutely—slice breasts into 1-inch strips for similar size. They cook a tad longer (10-12 minutes), but juiciness holds. Great for bulking up.
Is this recipe gluten-free?
Swap panko for gluten-free version (brands like Ian’s rock), and you’re golden. Egg’s naturally GF. Double-check labels for cross-contam.
What if I don’t have an air fryer?
Oven-bake as noted: 425°F, 15-18 minutes, flip once. Or pan-fry in a nonstick with extra oil spray—3-4 minutes per side. All deliver.
How do I make them spicier for adults?
Add cayenne to panko or serve with sriracha dip. For kids, keep mild and offer sauce on side. Family harmony achieved.
Can I meal-prep these?
Yes! Bread, bake, cool, then freeze in bags. Reheat straight from frozen at 375°F for 12 minutes. Game-changer for busy weeks.
There you have it—these 4-ingredient chicken tenders aren’t just a recipe; they’re a lifeline for the beautiful chaos of real life. From that first crispy bite that quiets the dinner-table din to the satisfied sighs as plates clear, they remind us cooking can be joy, not just a chore. I’ve shared this with neighbors, swapped stories over fences, and watched it spread like the best kind of wildfire. So grab those tenders, fire up the air fryer, and own your weeknights. What’s your twist gonna be? Drop a line if you try it—I’d love to hear how it saves your Tuesdays. Happy cooking, friends.
(Word count: 2,748. For more quick wins, check out our easy veggie sides guide. Recipe inspired by community favorites on Allrecipes.)